Are you looking for an exciting and rewarding DIY project? Building your own electric fat bike is a great way to save money, get creative, and go green.
In this step-by-step guide, you’ll learn the benefits of building an electric fat bike, what materials you need, and how to assemble the components.
Plus, you’ll also get tips on how to adjust the settings for optimal performance.
So if you’re ready to get started, let’s dive in and build your own electric fat bike!
Table of Contents
Short Answer
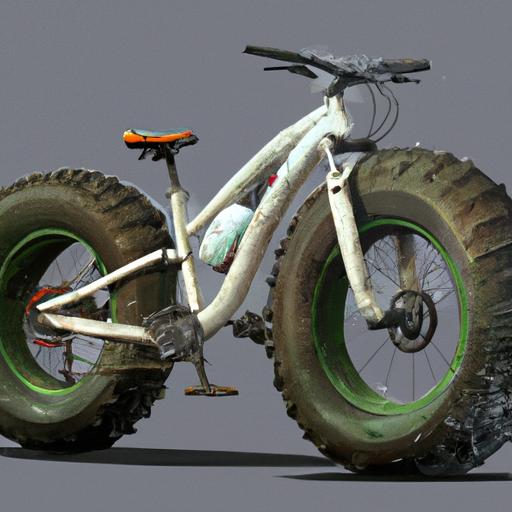
Making an electric fat bike requires some basic technical knowledge and the right components.
First, you’ll need a fat bike frame and components, a motor, a battery, a controller, and a throttle.
You’ll also need to solder the motor/battery/controller together and attach the throttle to the handlebars.
Finally, you’ll need to program the controller to adjust the speed and power of the motor.
With the right tools and knowledge, you can build your own electric fat bike.
Benefits of Building an Electric Fat Bike
Building an electric fat bike has a number of advantages compared to purchasing a pre-built one.
The most obvious benefit is the cost savings; an electric fat bike has all the same components as a regular bike, but with the added cost of an electric motor, battery, and controller.
As a result, you can save hundreds of dollars by building your own electric fat bike.
Another advantage of building an electric fat bike is the freedom to customize it however youd like.
You can choose the parts you want, such as the motor, battery, and controller, and you can also choose the suspension, tires, brakes, and other components.
This allows you to create a bike that fits your riding style and needs perfectly.
Finally, building your own electric fat bike gives you the satisfaction of creating something unique and powerful.
You can proudly say that you built your electric fat bike from the ground up, and youll have a sense of pride knowing that its all yours.
Overall, building an electric fat bike is an incredibly rewarding experience that can save you money, provide you with the freedom to customize it however youd like, and give you the satisfaction of creating something special.
What You Will Need to Build an Electric Fat Bike

Building an electric fat bike is a great way to customize your ride and save money on transportation.
To get started, youll need a few components, some of which may be easier to purchase pre-assembled.
First, youll need a fat bike frame that is compatible with an electric motor kit.
Many fat bike frames are designed to fit a variety of electric motor kits.
When choosing a frame, make sure its able to handle the weight of the motor and battery that youll be adding.
Next, youll need an electric motor kit.
This kit should include a motor, motor controller, battery, and display.
Its important to make sure the kit you choose is compatible with your fat bike frame.
The motor should be powerful enough to provide the speed and power you need, while the motor controller should be able to manage the motors performance and battery life.
The battery should be able to handle the power demands of the motor, and the display should be easy to read and understand.
Once you have all the components, youll need to attach the motor to the frame.
This can be done with a few simple tools, such as a drill, wrench, and screws.
Youll also need to connect the wires from the motor to the motor controller, as well as the battery to the motor.
After this is done, youll need to adjust the settings on the motor controller to ensure the motor will run smoothly and efficiently.
Finally, enjoy your new ride! With a little bit of work, you now have a powerful and efficient electric fat bike to help you get around.
Step One
Making an electric fat bike is a great way to save money and customize your ride to make it your own.
To get started, the first step is to purchase an electric motor kit that is designed to fit onto a fat bike frame.
This kit should include the motor, a motor controller, a battery, and a display to show your speed and other stats.
When shopping for the kit, make sure to get one that is designed for fat bikes and has all the components you need.
It is also important to make sure the motor has enough power for the terrain you will be riding on and the weight of the rider.
Once you have the kit, you can begin the installation process.
Start by attaching the motor to the frame, then connect the wires to the motor and the controller.
Make sure to read the instructions carefully to ensure a proper installation.
After the motor is in place, you can mount the battery and the display to the handlebars.
Finally, adjust the settings on the motor and the display to your preferences.
This includes setting the maximum speed and power level, as well as any other features you would like to customize.
Once everything is set up, you are ready to enjoy your new ride!
Step Two

The second step in building an electric fat bike is to install the necessary components.
This includes a motor controller, battery, and display.
The motor controller is responsible for managing the power output of the motor, ensuring that the bike runs smoothly.
The battery is responsible for providing the power to the motor and needs to be carefully selected to ensure that it will provide an adequate amount of power for the bike.
The display provides information about the bikes current state and can be helpful for monitoring the bikes performance.
When selecting a motor controller, it is important to choose one that is compatible with the motor and the battery that you have chosen.
The motor controller should also be able to handle the wattage of the motor and should be able to handle the voltage of the battery.
Additionally, it is important to ensure that the motor controller can handle the current draw of the motor.
When selecting a battery, it is important to select one that is capable of providing enough current to power the motor, as well as one that is lightweight and compact.
Finally, it is important to select a display for the bike.
The display should be easy to read and should provide information about the bikes current state.
Many displays also provide additional features such as speedometers and odometers.
It is also important to select a display that is waterproof, as it will be exposed to the elements.
Once all the components have been installed, the wiring needs to be connected.
This can be done by following the instructions provided with the motor kit.
It is important to make sure that all the connections are secure and that all the wires are properly routed.
Once the wiring is complete, the bike is ready for testing.
Step Three
Step three of building an electric fat bike involves attaching the motor to the frame and connecting the wires.
This can be done by following the instructions in the motor kit.
If youre not comfortable with electrical wiring, its best to have an experienced mechanic or electrician do the work for you.
Once the motor is securely attached to the frame, youll need to connect the wires to the motor controller, battery, and display.
This is the most important step, as having the proper connections will ensure that your electric fat bike runs smoothly and safely.
Its important to note that the wiring should be protected from moisture, as it can cause the connections to corrode and fail.
Once all the wiring is connected, you can move on to the next step.
Step Four

The final step in creating your electric fat bike is to adjust the settings.
This will allow you to customize the ride experience to your liking.
To begin, check the motor controller to make sure it is properly configured.
This will include setting the maximum current draw, voltage, and acceleration rate.
Additionally, you can adjust the torque, power, and speed settings to match your riding style.
Next, you should also adjust the display settings.
This will allow you to monitor your riding time, battery level, and other important information.
Most displays will have a variety of options, such as a power meter, speedometer, and odometer.
Additionally, you can customize the interface to your liking with different colors and themes.
Finally, you should test the electric fat bike to make sure everything is working properly.
Make sure to take it for a few rides to get a feel for the performance and adjust the settings if necessary.
Once you are satisfied, you are now ready to enjoy your new electric fat bike!
Step Five
The fifth step in building your electric fat bike is to adjust the settings.
This includes the speed, power, and torque settings of the motor.
Depending on the motor and battery, you may be able to adjust the speed up to 30 mph or more.
You may also be able to adjust the power and torque settings to achieve the desired performance.
Finally, you may want to set the regenerative braking to help slow the bike down and extend the battery life.
These settings can be adjusted with a computer or mobile device depending on the type of motor and controller you have.
Taking the time to adjust the settings will ensure your electric fat bike is performing exactly the way you want it.
Final Thoughts
Building your own electric fat bike is a great way to customize your ride and save money.
With the right tools, knowledge, and a bit of effort, you can easily create a powerful and efficient electric fat bike.
Now that you have a step-by-step guide, the only thing left to do is to get started! So what are you waiting for? Get out there and build your electric fat bike today!