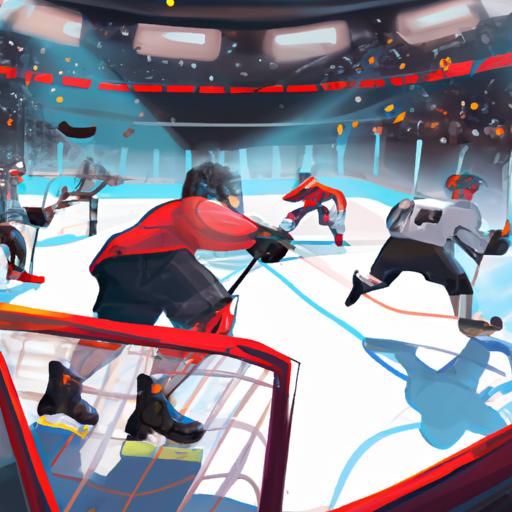
For any hockey goalie, having the right gear is essential in playing your best game.
But having the right gear is not enough; you must also keep it in top condition to ensure the best performance.
Cleaning your hockey goalie gear is not only important for performance, but it can also help to extend the life of your equipment.
In this article, we will provide you with a step-by-step guide on how to properly clean your hockey goalie gear, including what supplies you need, how to soak and scrub, and how to deep clean with a specialized machine.
Read on to learn everything you need to know about keeping your hockey goalie gear in top condition!
Table of Contents
Short Answer
Hockey goalie gear should be cleaned regularly to ensure optimal performance and prevent the buildup of bacteria.
Start by hand-washing the gear in a sink with warm water and a mild detergent.
Rinse the gear thoroughly to remove all of the soap.
Allow the gear to air-dry, and make sure it is completely dry before storing it.
Finally, use a disinfectant spray to kill any remaining bacteria.
Why is Properly Cleaning Hockey Goalie Gear Important?
When it comes to playing hockey, the goalie is one of the most important players on the ice.
As such, its essential that they have the proper gear to protect them and keep them safe while theyre in the goal.
But having the right gear isnt enoughits also important to keep the gear clean and in good condition.
Properly cleaning hockey goalie gear is essential for ensuring optimal performance and hygiene.
As the goalie is constantly exposed to sweat, dirt, and bacteria, having clean gear is important for both comfort and safety.
Sweat and dirt can build up on the gear, making it heavy and uncomfortable to wear, while bacteria can lead to skin irritation and infections.
Furthermore, a buildup of dirt and grime can affect the gears performance.
It can become stiff, which can make it difficult to move quickly and accurately, and may also cause the goalie to become overheated.
By regularly cleaning the gear, the goalie can ensure that it remains lightweight and flexible, and that it keeps them cool and comfortable.
Having clean hockey goalie gear is also important for the longevity of the gear.
Over time, dirt and grime can wear down the material, causing it to become weakened and prone to tears and rips.
By regularly cleaning the gear, the goalie can extend its life and get more use out of it.
Additionally, if any parts of the gear are worn or damaged, they should be replaced to ensure optimal performance and safety.
By properly cleaning hockey goalie gear, you can keep your equipment in top shape and ensure it performs optimally.
This will help you stay comfortable and safe on the ice, while also extending the life of your gear.
What is Needed to Clean Hockey Goalie Gear?

When it comes to cleaning hockey goalie gear, there are a few essential items you will need.
Firstly, you will need a mild detergent or a specialized hockey cleaning product.
When using a detergent, it is important to choose one that is gentle and non-abrasive – harsh chemicals could damage your gear.
Additionally, you will need a soft brush or cloth to gently scrub away any dirt and grime, and a bucket or bowl to soak the gear in.
For a more thorough clean, you may want to invest in a specialized hockey cleaning machine.
This machine uses a combination of hot water, detergent, and rotating brushes to remove deep-seated dirt and bacteria that cannot be removed by hand.
Step-by-Step Guide to Cleaning Hockey Goalie Gear
Cleaning hockey goalie gear is essential for ensuring proper hygiene and performance. To get the most out of your goalie gear and keep it in top shape, it is important to clean it regularly and thoroughly. The following is a step-by-step guide to cleaning hockey goalie gear:
1. Begin by pre-soaking the gear in warm water and a mild detergent or specialized hockey cleaning product. Let the gear soak in the soapy water for 10-15 minutes.
2. Next, use a soft brush or cloth to gently scrub away any dirt and grime. Be sure to pay special attention to any hard-to-reach areas, such as the straps, buckles, and pads.
3. Rinse the gear thoroughly with clean water and hang it up in a shady spot to dry. Avoid hanging the gear in direct sunlight, as this can cause the material to fade or crack.
4. Once the gear is dry, check for any worn or damaged parts. If any parts need to be replaced, do so as soon as possible to ensure optimal performance.
5. For a more thorough clean, consider investing in a specialized hockey cleaning machine. These machines use a combination of high-pressure water and rotating brushes to remove deep-seated dirt and bacteria.
By following these steps, you can keep your goalie gear in top shape and protect yourself from potential injury.
With a few simple steps, you can ensure that your goalie gear is clean and ready for game day.
Soaking the Gear in Soapy Water

Soaking the goalie gear in soapy water is an essential step to effectively clean the equipment and ensure optimal performance.
To do this, fill a large container or basin with warm water and add a mild detergent or a specialized hockey cleaning product.
Place the goalie gear in the soapy water and let it soak for 10-15 minutes.
This allows the detergent to penetrate the fabric of the gear and loosen any dirt and grime.
After it has had a chance to soak, use a soft brush or cloth to scrub away any debris or dirt.
When you are done, thoroughly rinse the gear and hang it up to dry in a shady spot.
This is important, as exposing the gear to direct sunlight can cause the colors to fade.
Additionally, it is important to replace any worn or damaged parts of the goalie gear before use, as this can affect the performance of the gear.
For a more thorough clean, consider investing in a specialized hockey cleaning machine.
This machine uses a combination of high-pressure water and detergent to remove any deep-seated dirt and bacteria from the gear.
This can help to keep your gear in top shape and ensure optimal performance.
Scrubbing Away Dirt and Grime
When it comes to cleaning hockey goalie gear, you’ll want to take extra care in scrubbing away dirt and grime.
To do this, start by soaking the goalie gear in warm water and a mild detergent or specialized hockey cleaning product for 10-15 minutes.
This will help loosen any built-up dirt and grime for easy removal.
Once the soaking is complete, use a soft brush or cloth to gently scrub away the dirt.
Make sure to pay special attention to areas with a lot of wear and tear, such as the top of the helmet and the chest protector.
You can also use a specialized hockey cleaning machine to remove deep-seated dirt and bacteria.
This is a great way to ensure that your goalie gear is completely clean and free of bacteria.
After you’re done scrubbing, be sure to rinse the gear thoroughly and hang it up to dry in a shady spot.
Rinsing and Drying the Gear

Once the hockey goalie gear has been thoroughly scrubbed, its important to rinse it completely with clean water to remove any remaining dirt and soap residue.
After rinsing, the gear should be hung up in a shady spot to dry.
This will help ensure that the gear dries thoroughly and doesnt harbor any bacteria or dirt.
Its important to note that the gear should never be placed in direct sunlight, as this can cause discoloration and damage to the fabric.
Additionally, the gear should never be placed in the dryer, as the heat could warp the material.
Instead, its best to hang the gear up to air dry.
If the weather is too cold or humid, an indoor drying rack can be used.
To ensure optimal performance, the gear should be completely dry before its used again.
Once the gear is dry, its important to inspect it for any wear and tear.
If any parts are worn or damaged, they should be replaced immediately to ensure that the goalie has the best possible protection.
This includes things like buckles, straps, and pads.
Replacing these parts as soon as they begin to wear will help to ensure that the goalie is safe and protected while playing.
Replacing Worn or Damaged Parts
Replacing worn or damaged parts on goalie gear is an important step in keeping your gear in top shape.
Worn or damaged parts can cause your gear to perform poorly or even be dangerous to use, so its important to replace them when needed.
The first step is to inspect your gear for any worn out or damaged pieces.
Look for signs of wear and tear on the straps, buckles, and padding.
You should also check for any rips, tears, or holes in the material.
If you notice any of these signs, its time to replace the part.
When replacing parts, its important to make sure you get the right size and shape.
Make sure to measure the length of the straps, the width of the buckles, and the size of the padding.
If youre not sure, its best to take your gear to a professional to get the right measurements and find the right parts for your gear.
When youre ready to replace the parts, make sure to use quality materials.
Cheap materials will wear out quickly and wont last as long as higher quality materials.
When attaching the new parts, make sure to use the right tools and techniques.
If youre not sure, its best to take your gear to a professional to get the job done right.
By replacing worn or damaged parts, you can ensure your goalie gear is in top shape and performing at its best.
With a few simple steps, you can keep your gear in top condition and get the most out of your game.
Deep Cleaning with a Specialized Hockey Cleaning Machine

Deep cleaning your hockey goalie gear is essential to maintaining its performance and hygiene.
A specialized hockey cleaning machine is an invaluable tool that can help you do just that.
Such a machine utilizes a combination of pressurized steam, cleansers, and brushes to deeply clean and sanitize your goalie gear.
The steam penetrates deep into the fibers of the gear, loosening and removing any dirt, grime, and bacteria that have built up over time.
The cleansers help to further remove any dirt, and the brushes provide a gentle scrubbing action to ensure that no dirt or debris is left behind.
When using a specialized hockey cleaning machine, it is important to follow the manufacturers instructions closely.
Many machines come with a variety of cleaning modes, so you can adjust the settings to fit your particular needs.
For instance, if you are cleaning heavily soiled gear, you may want to use a higher pressure setting or a longer cycle time.
After using the machine, rinse the gear thoroughly with clean water and hang it up in a shady spot to dry.
Regularly using a specialized hockey cleaning machine is an effective way to ensure your goalie gear looks and performs its best.
With a few simple steps, you can help keep your gear in top shape and ensure optimal performance.
Final Thoughts
Cleaning your hockey goalie gear is an essential part of ensuring performance and hygiene.
With the step-by-step guide outlined in this article, you can keep your goalie gear in top shape with just a few simple steps.
Soak the gear in warm soapy water, scrub away dirt and grime, rinse and dry, and replace any worn or damaged parts.
For a more thorough clean, use a specialized hockey cleaning machine.
Now that you know how to properly clean hockey goalie gear, get out there and keep your gear ready for the next big game!