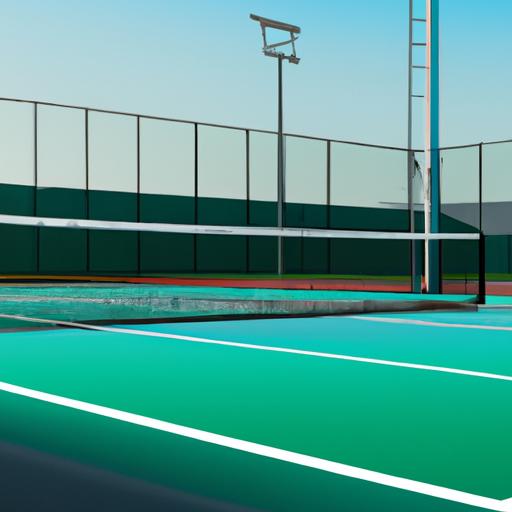
Lighting up a tennis court can be a daunting task, but it doesn’t have to be.
With the right materials and a bit of guidance, you can be on your way to a well-lit court in no time.
In this article, we’ll walk you through the process step-by-step, from marking out the light pole positions to adjusting light levels for optimal play.
By the end, you’ll be ready to take your tennis game to the next level with bright, evenly-lit courts.
Let’s get started!
Table of Contents
Short Answer
Installing tennis court lights requires specialized knowledge and expertise.
First, an electrician should be hired to determine the number and type of lights needed to adequately illuminate the court and to connect the lights to a power source.
Then, the lights should be installed on poles that are securely anchored into the ground and appropriately placed to ensure adequate lighting.
Finally, the lights should be tested to ensure they are safely and correctly installed.
Materials Needed for Tennis Court Lighting
Installing tennis court lights can be a complicated task, but it doesn’t have to be.
With the right materials and tools, you can have your court up and lit in no time.
Before you start installation, you’ll need to make sure that you have all the necessary materials and tools.
First, you’ll need to purchase lighting fixtures that are designed for outdoor use.
Outdoor lighting fixtures are designed to withstand the elements and provide bright illumination.
Make sure to purchase fixtures that are rated for outdoor use and are suited for your court’s size and layout.
Next, you’ll need to purchase light poles and mountings.
Make sure to get poles that are designed to bear the load of the fixtures and light the court from the best angle.
For pole mountings, you’ll need to make sure that the mountings are weatherproof and secure.
You’ll also need to purchase wiring and cable connectors to connect the fixtures to a power source.
Make sure to purchase wiring and connectors that are rated for outdoor use and are suitable for the voltage and wattage of the fixtures.
Finally, you’ll need tools such as shovels, post hole diggers, and power drills for installation.
Make sure to use the appropriate tools and follow safety precautions when working with power tools.
With the right preparation, you can have your court lit and ready for play in no time.
Marking Out Light Pole Positions

Marking out the positions for the light poles is a crucial step in installing tennis court lights.
It must be done correctly in order to ensure the poles are placed in the optimal positions for the best lighting experience.
When it comes to marking the light pole positions, its important to take into account the size of the court, the direction of the sun, and the amount of light needed for the court.
To begin, youll need to measure the court in order to determine the exact size.
This will help you determine the optimal placement of the light poles.
Then, youll need to find the direction of the sun so that you can place the poles accordingly.
This will help ensure that the light poles are in the best positions to provide the most amount of light without causing any glare or shadows.
Once youve determined the best positions for the light poles, youll need to mark them out.
This can be done by using a can of spray paint or chalk.
Its important to make sure the marks are visible and that theyre placed correctly so that you dont have to adjust the positions of the poles later.
Finally, youll need to measure the amount of light needed for the court.
This will depend on the size of the court, the type of surface, the type of lighting fixtures, and the desired playing experience.
Youll want to make sure the lights are not too bright or too dim for the court.
Once youve determined the optimal lighting levels, you can mark out the positions of the light poles accordingly.
Marking out the positions of the light poles is a crucial step in installing tennis court lights.
It must be done correctly in order to ensure the poles are placed in the optimal positions for the best lighting experience.
With the right measurements and calculations, you can have your court lit and ready for play in no time.
Digging Holes for the Light Poles
Installing the light poles is one of the most important steps in setting up your tennis court lighting.
To begin, you will need to mark out where the poles will be placed.
Make sure to evenly space the poles to ensure adequate coverage for the court.
Once you have the positions marked, you will need to begin digging the holes for the poles.
It is important to dig the holes deep enough to ensure that the poles are securely anchored to the ground.
Depending on the type of soil you are dealing with, you may need to use an auger or post-hole digger to ensure the holes are deep enough.
When digging, make sure to keep the holes straight, as this will ensure that the poles are properly aligned when they are installed.
Once the holes are dug, fill them with concrete to anchor the poles in place.
Take care to ensure that the poles are level when they are installed, as this will ensure optimal lighting coverage.
Securing the Light Poles in Place

Once the holes are dug and the poles are in place, it’s time to secure them.
This is a crucial step in the installation process, as the lights can become loose over time and cause damage to the court or to players.
To secure the poles, you’ll need to use a concrete mix that is specifically designed for outdoor use.
Make sure to read the instructions on the packaging carefully to ensure you use the correct amount of water and follow the directions correctly.
Once the mixture is ready, carefully pour it into the hole around the pole and tamp it down.
You’ll need to let the concrete dry completely before you move on to the next step.
After the concrete is dry, use a level to make sure the pole is straight and secure.
If not, you can adjust the pole until it’s level.
Make sure to check the pole periodically to ensure it remains secure.
Connecting the Lighting Fixtures to a Power Source
Once you have your lighting fixtures installed and secured in place, the next step is to connect them to a power source.
This can be done in several different ways depending on your situation.
If you have an existing power source nearby, such as an outdoor outlet, you can simply run an extension cord from the outlet to the lights.
Make sure to use an extension cord specifically designed for outdoor use.
If you are going to be connecting more than one light, you may want to consider using a multi-outlet power strip to help simplify the wiring process.
If you dont have an existing power source, youll need to install one.
This will require hiring a qualified electrician to run the necessary wiring and hook up the power source.
Depending on your local regulations, you may also need to obtain a permit for this work.
Once the power source is installed, you can then connect the lighting fixtures to it.
Make sure to use the appropriate wiring and connections for the fixtures.
If you are unsure of how to properly wire the fixtures, consult an electrician for assistance.
Once the wiring is complete, you can then test the lights to make sure they are working properly.
With the right preparation, you can have your court lit and ready for play in no time.
Adjusting Light Levels for Optimal Playing Experience

Adjusting the light levels of your tennis court lighting is an important step in ensuring your players have the best possible playing experience.
Its important to find the balance between having enough light to be able to see the court clearly and not having too much light that it causes glare or discomfort.
When adjusting your tennis court lighting, youll need to determine the type of lighting youre using and the wattage of each fixture.
This will help you determine the total wattage of your court and the best level of lighting for your court.
Youll also need to consider factors such as the size of the court, the height of the lights, and the location of the court, as these can affect the amount of light you need.
Once you have determined the wattage, you can start to adjust the light levels.
This can be done by using dimmers or by adjusting the positioning of the lights.
Dimmers will allow you to adjust the light level without having to move the fixtures, while adjusting the positioning of the lights will allow you to control the spread of the light.
If youre using LED lights, you can also use a timer to control the amount of light thats produced.
Once youve adjusted the light levels, its important to test the court and make sure that the lighting is satisfactory.
You should have a few people play a game on the court and observe how the lighting affects the game.
If the lighting is too bright or too dim, you can make adjustments until you find the perfect balance.
Installing and adjusting tennis court lights can seem like a daunting task, but with a little preparation and the right materials, you can have your court lit and ready for play in no time.
With the right light levels, you can ensure that your players have a great playing experience and that your court is properly illuminated.
Troubleshooting Common Issues
Once the lights have been installed, its important to check them regularly for potential problems.
Common issues include flickering lights, poor light quality, and incorrect lighting levels.
In order to troubleshoot these issues, its important to first inspect the fixtures for any damage.
If the fixtures are undamaged, then the issue may be due to a loose or improperly connected wiring.
If this is the case, then its important to check the wiring connections to ensure they are secure.
In addition, its important to check the light levels of the fixtures.
If the light levels are too dim or too bright, then you may need to adjust the settings on the fixtures.
This can be done by using a light meter to measure the intensity of the light output and adjusting the settings accordingly.
Finally, if the light quality is poor, then it may be due to the type of bulbs used.
Different types of bulbs can produce different light outputs, so its important to choose the right bulbs for the job.
Additionally, bulbs can become dimmer over time, so its important to replace them periodically to ensure the best light quality.
By following these tips, you can ensure that your tennis court lights are always in top condition.
With the right preparation and maintenance, you can be sure that your court will always be ready for play.
Final Thoughts
Installing tennis court lights may seem like an intimidating task, but with the right preparation, you can make it a breeze.
With the necessary materials and tools, you can have your court lit and ready for play in no time.
Don’t forget to adjust the light levels for the optimal playing experience – this will ensure that you and your opponents have the best possible court experience.
With this step-by-step guide, you have the information you need to install your own tennis court lights.
Now it’s time to get out there and get playing!